
This is a great project to use as an excuse to chug a few beers! All kidding aside, once you get the hang of it, they come together in just a few minutes and always bring a smile to the recipient.
Tools Required:
Hammer
Tin Snips
Bolt cutter or hacksaw
Trailer ball (for shaping)
Pliers
Hand drill

1. Find a few friends to help empty a six pack to collect the bottle caps.

2.Once you have a handful of bottle caps, remove the rubber seal from the inside of the cap. The simplest method that I’ve found is to hold the cap over an electric burner. Once the seal starts to “blister”, lift it from the cap with a small screwdriver.


3. You will need to “round over” the edges of the bottle caps. An old 2” ball for a trailer hitch works perfect. Secure the ball in a vise and gently tap the bottle cap with a hammer to form the shape. Repeat the process for each bottle cap. I typically use five or six caps for each rose.


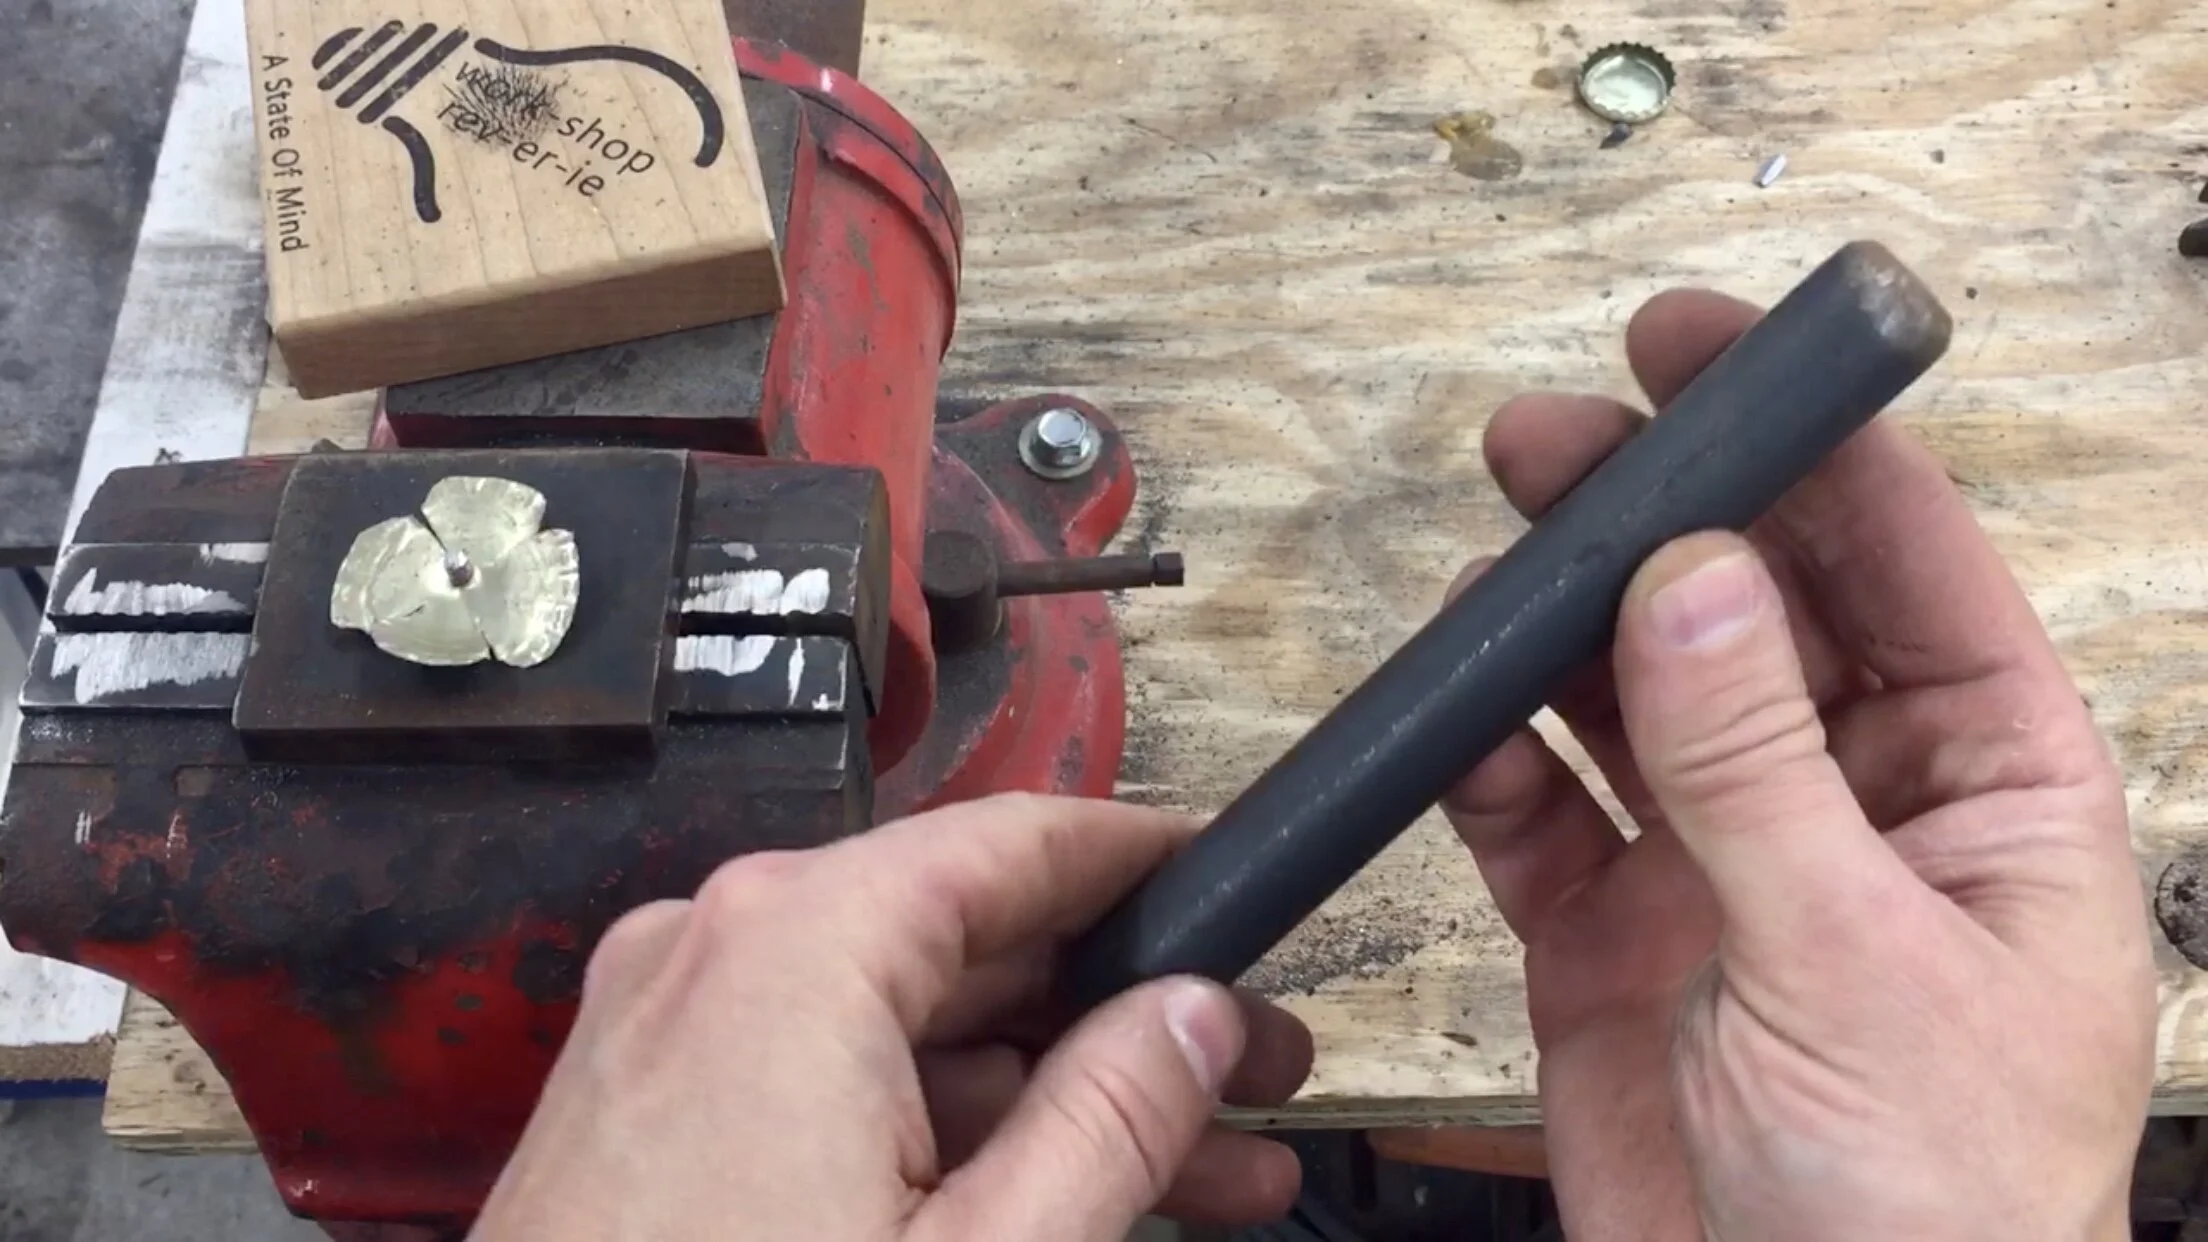
4. I use 8d 2-1/2” duplex nails for the stems. The duplex nails work best as there are two nail heads. The lower nail head provides a “stop” to hold the bottle cap petals in place. Cut the top head off with a bolt cutter or hacksaw.


5. Drill a hole in the center of each cap. I used a 1/8” drill bit as it fit the diameter of the nail perfectly.


6. Cut each cap from the outside, towards the center. Don’t get too close to the center hole as it will weaken the petal. 1/8” away from the center is usually sufficient. I shoot for four petals on each bottle cap. Once you cut the petals, round the outer edges. When finished, your bottle cap should look “clover-ish.”


7. Drill a hole through a small piece of steel. You will use this as a backing pad so you can “peen” the the part of the stem that protrudes from the petals after you finish stacking them. If you don’t have access to a small piece of steel, clamp the nail in a vise.


8. Arrange the petals so that the seams in each layer are staggered meaning the seam from the petal above should not be in alignment with the petal below.


9. It is important to have the “petals” sitting flat against the lower nail head. I drilled a hole in the end of a steel rod. The common name for this is a “monkey tool.” It works well at seating the petals. If you don’t have access to a steel rod, you can use a small piece of wood with a hole drilled in it or tap them down onto the lower nail head with a dull screwdriver.


10. Once the petals are stacked and seated, you should have a small piece of the stem protruding through the top of the petals. If there is more than 1/8” showing, remove the petals and file the stem as it will bend and knock the petals out of alignment when you peen the upper stem. It takes a few tries to dial in the proper length.

11. Gently tap the stem until it starts to mushroom over. A ball peen hammer works best, but any hammer will do. The goal is to seat the top of the stem down onto the petals. If you go too far with it you run the risk of tearing a petal.


12. Clamp the stem in a vise. Carefully lift the petals towards the center one layer at a time. Using a pair of pliers, gently curl the petals to wrap around and overlap one another.


13. Once all of the layers have been folded towards the center, start curling the tips of the petal outward. Work from the outer layers toward the center.


14. Bend the stem to your liking.

15. Share it with that special someone.

16. ….or add a dab of paint for some extra pizazz….


Click the link above to download a copy of a seven layer rose template. You don’t need to use all seven layers in your rose. Four to five layers work just as well.
Simply print the pattern on standard printer paper.
Adhere the pattern to your sheet material (copper, steel, etc.) with spray adhesive or glue sticks and you're ready to go.